The OAuth2.0 Web Server Flow is designed for server-to-server communication where a client application (typically a web server) accesses Salesforce resources on behalf of a user. This flow is ideal for scenarios where the server needs to maintain a secure connection with Salesforce and perform actions using an access token.
Key Components of the Flow
- Connected App: A Salesforce Connected App acts as the medium through which external applications connect to Salesforce. It provides the client credentials (Client ID and Client Secret).
- Authorization Code: A temporary code that the client application exchanges for an access token. It is short-lived and single-use.
- Access Token: The key that grants the client application access to Salesforce resources within the specified scope.
- Refresh Token: (Optional) A token used to obtain a new access token without re-authenticating the user.
How the Web Server OAuth Flow Works
The Web Server OAuth Flow involves three main steps:
1. Create an External Client App
- Navigate to Setup -> External Client App -> Create a new External Client App
- Define Policies and Settings
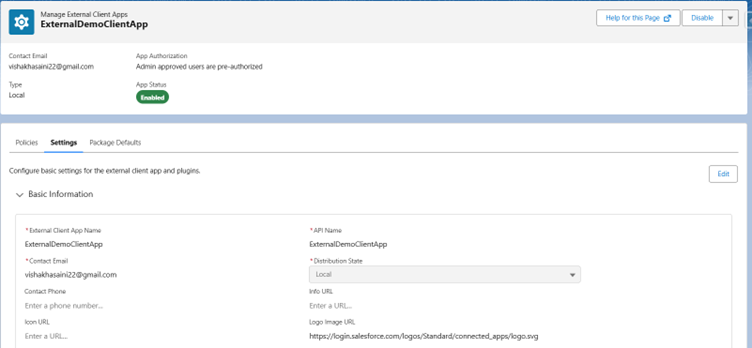
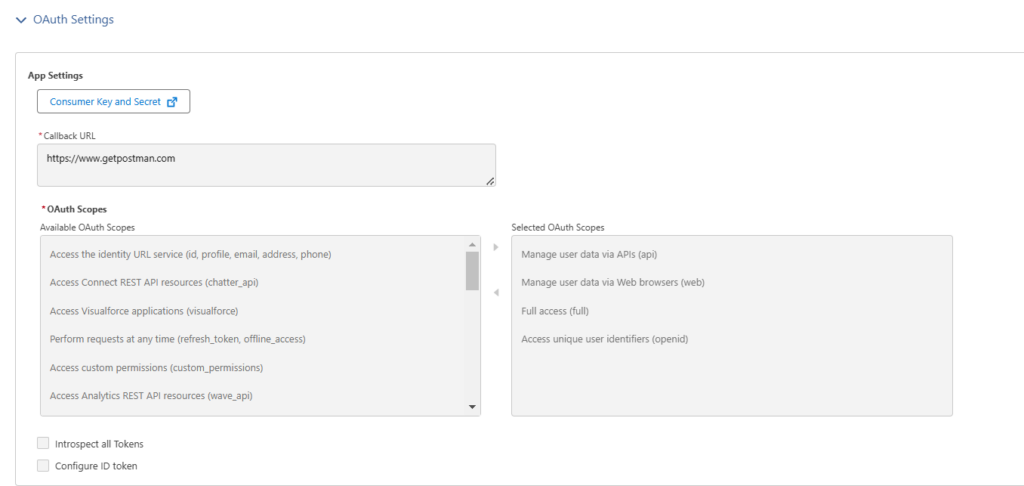
3. Enable OAuth and add scopes. Copy the Consumer Key and Secret
2. Authorization Request
To initiate the OAuth 2.0 web server flow, the external web service, using the connected app, submits an authorization code request with the authorization code grant type to Salesforce’s authorization endpoint. Once it receives an authorization code, the connected app can validate its authorization as a trusted client and request an access token. The call is made in the form of an HTTP redirect.
The URL used for this step includes the following parameters:
- Endpoint:
- Production: https://login.salesforce.com/services/oauth2/authorize
- Sandbox: https://test.salesforce.com/services/oauth2/authorize
- Parameters:
- response_type=code
- client_id=<Consumer_Key>
- redirect_uri=<Callback_URL>
- state=<Optional_State_Value>
Example:
https://vishakhasaini-dev-ed.my.salesforce.com/services/oauth2/authorize?client_id=3MVG9YDQS5WtC11rIQHiPC3h5QtJaBTH7SCaF63.CFds6LiJ.1qasvrvjZIK9jmd_T4SEcJz0PG_keEcg7K0y&redirect_uri=https://www.getpostman.com&response_type=codeAfter the user grants permission, Salesforce redirects them back to the specified callback URL with an authorization code in the query string:
https://www.example.com/callback?code=AUTHORIZATION_CODE3. Request an Access Token
To request an access token, the connected app passes the authorization code to the Salesforce token endpoint as an HTTP POST.
- Endpoint:
- Production: https://login.salesforce.com/services/oauth2/token
- Sandbox: https://test.salesforce.com/services/oauth2/token
- Request Body:
- grant_type=authorization_code
- code=AUTHORIZATION_CODE
- client_id=YOUR_CONSUMER_KEY
- client_secret=YOUR_CONSUMER_SECRET
- redirect_uri=YOUR_CALLBACK_URL
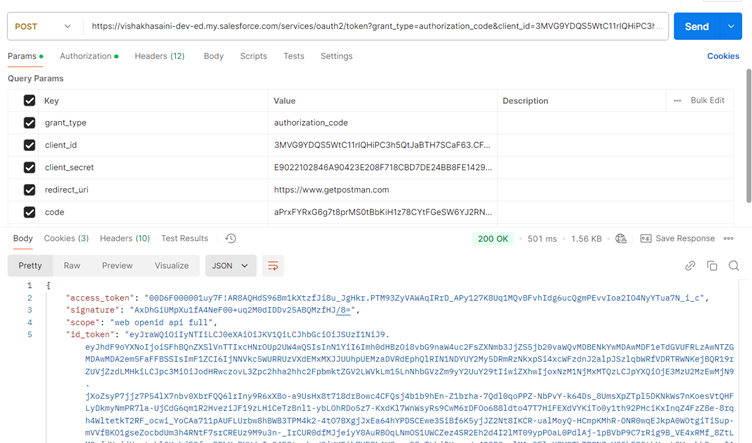
Note: Make sure the request is POST and URL has domainName.my.salesforce.com
Request Access Token Using Postman
- Create a new Postman request
- Navigate to Authorization tab
- Select Auth Type as OAuth 2.0
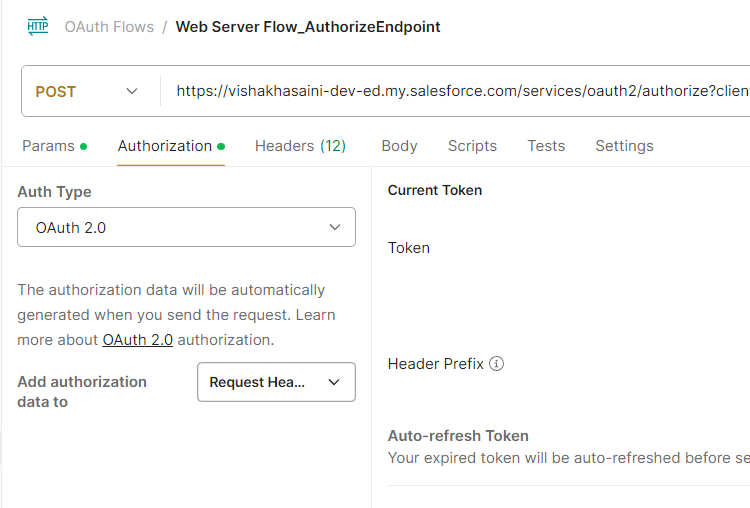
- Under Configure New Token
- Select Grant Type – Authorization Code
- Callback URL – your connected app callback URL
- Auth URL – https://your.instance/services/oauth2/authorize
- Access Token URL – https://your.instance/services/oauth2/token
- Client ID – your consumer key
- Client Secret – your consumer key
- Scope – Your scopes
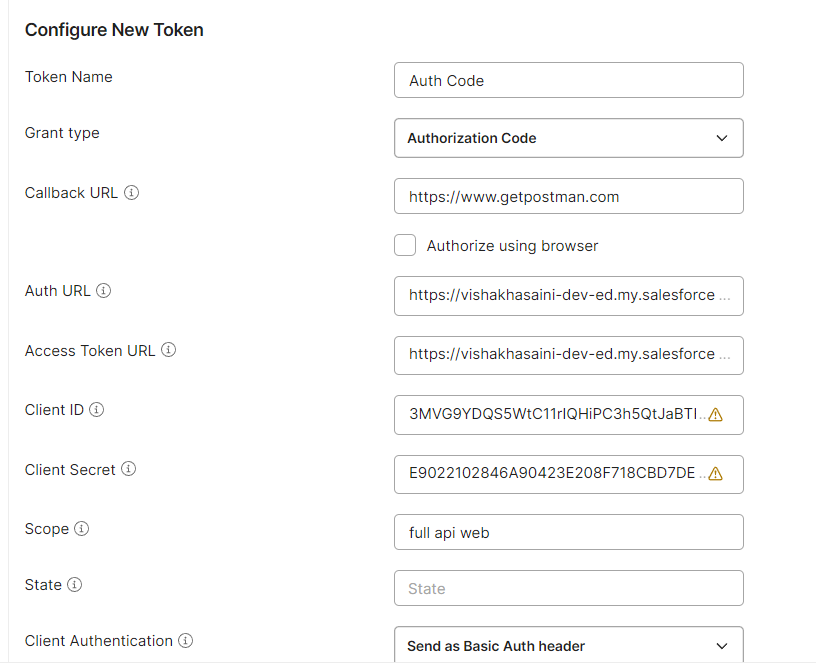
- Click Get New Access Token button
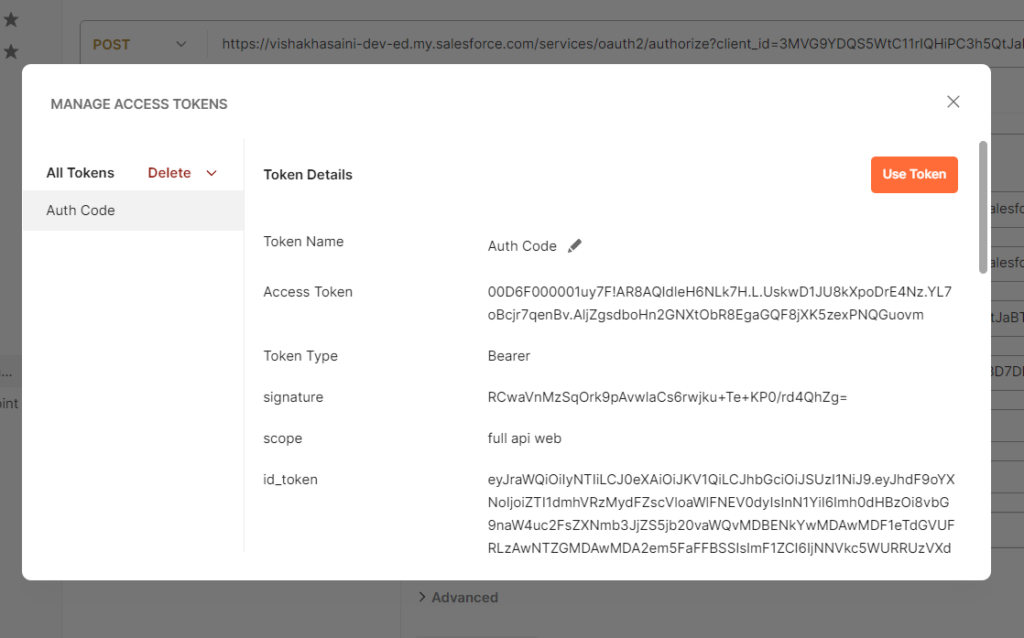
- Authenticate using your Salesforce Credentials and allow access
- After successful authentication, Access Token will be granted
Resources:

