Files Connect is a Salesforce feature that allows users to access, share, and attach files stored in external file systems (like Box, Google Drive, and SharePoint) without importing them into Salesforce. Files remain in the external storage location, ensuring a single source of truth, while Salesforce users can interact with the files seamlessly.
In this blog post, we’ll integrate Salesforce Files Connect with Box:
- Access Box files within Salesforce without switching between systems
- Link external files to Salesforce records, like opportunities, leads, and cases
- Ensure secure file sharing with permissions managed through Box
Here’s how you can set up the integration:
Step 1: Prerequisites
Before starting, ensure you have:
- A Salesforce Enterprise, Unlimited, or Developer Edition
- A Box Admin Account to configure API access
- Salesforce Admin permissions to set up Files Connect
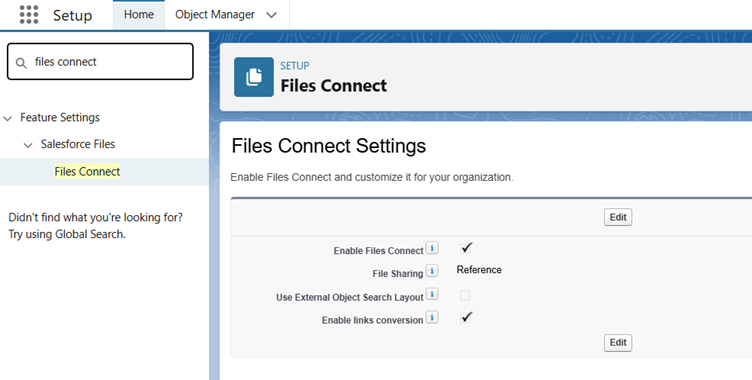
Step 2: Enable Files Connect in Salesforce
- Go to Setup in Salesforce
- Search for Files Connect in the Quick Find box
- Enable Files Connect and save the changes
Step 3: Set Up Box OAuth Credentials
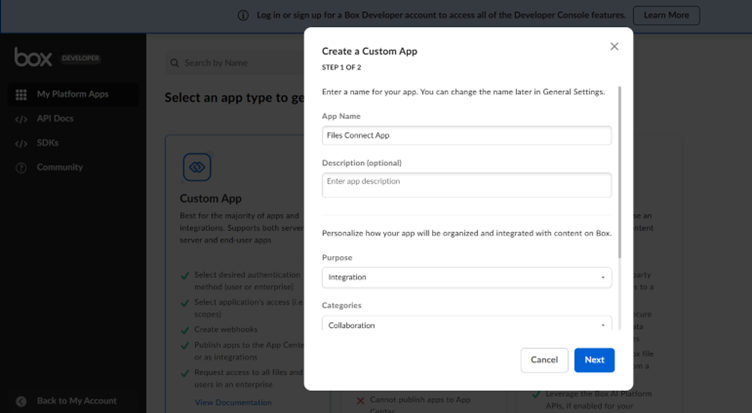
- Log in to your Box Developer Console at developer.box.com
- Create a new app and select Custom App
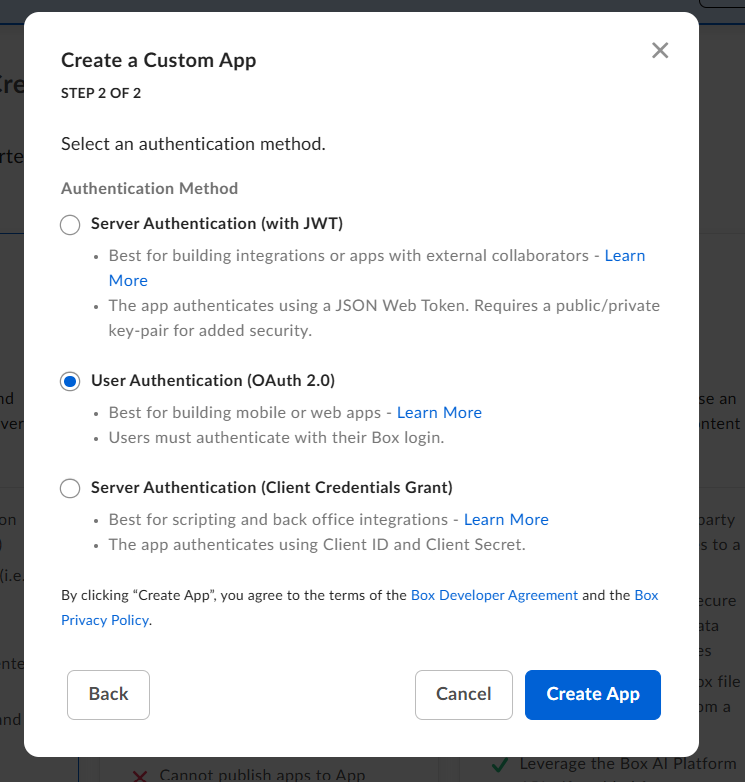
3. Select an Authentication Method User Authentication (OAuth 2.0)
4. After creating the app, note down the Client ID and Client Secret
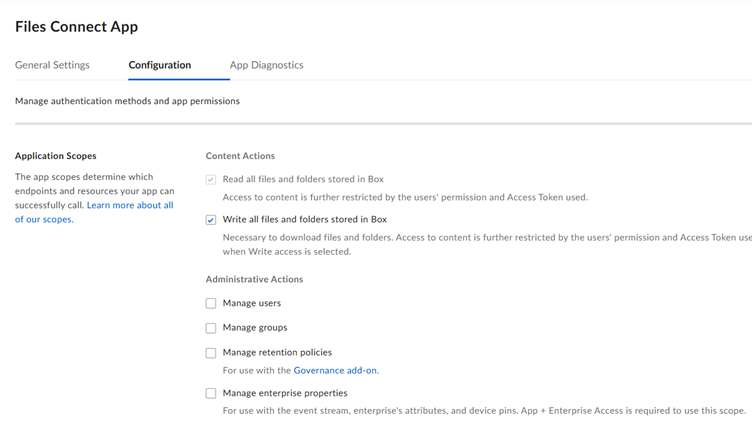
5. Ensure the app has the necessary permissions (Read and write all files and folders in Box)
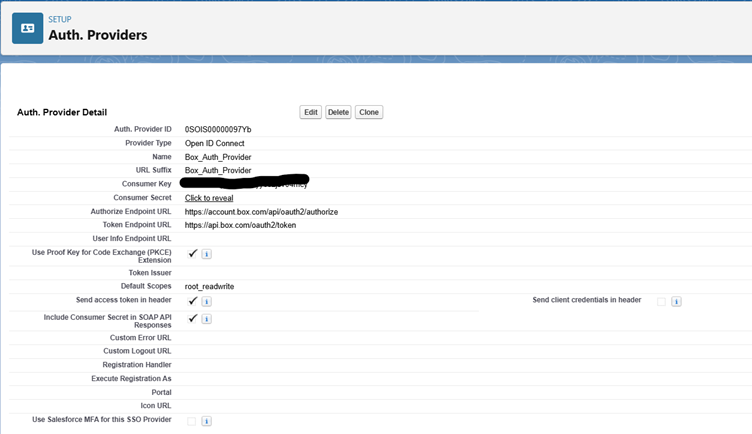
Step 4: Configure an Authentication Provider in Salesforce
- Go to Setup > Auth. Providers
- Click New and select Open ID Connect as the provider type
- Enter the following details:
- Name: Box Auth Provider
- Consumer Key: The Box Client ID
- Consumer Secret: The Box Client Secret
- Authorize Endpoint URL: https://account.box.com/api/oauth2/authorize
- Token Endpoint URL: https://api.box.com/oauth2/token
- Save the configuration. Salesforce will generate a Callback URL—copy this and update it in your Box app settings.
Step 5: Create an External Data Source
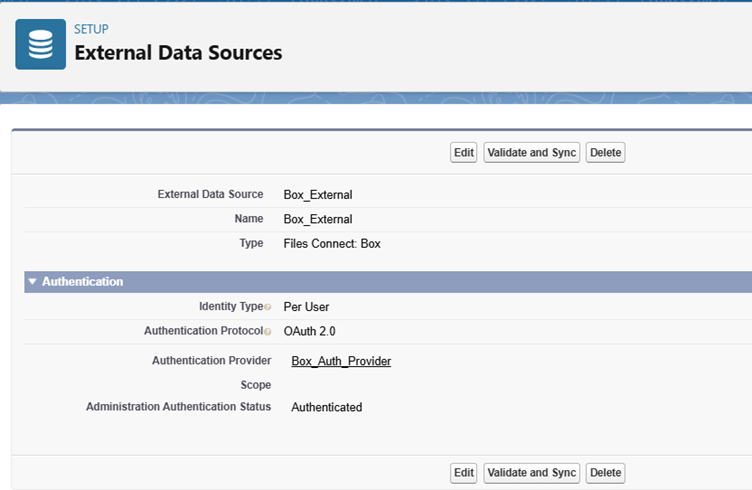
- In Salesforce, go to Setup > External Data Sources
- Click New External Data Source and fill in:
- Name: Box External Data
- Type: Files Connect: Box
- Identity Type: Per User (if individual access) or Named Principal
- Authentication Protocol: OAuth 2.0
- Auth Provider: Select the Box Auth Provider created earlier
- Validate and sync the external data source to connect Salesforce with Box
Step 6: Assign Permissions to Users
- Assign Files Connect Cloud permission to users via Permission Sets or Profiles
- Ensure users have access to the Box external data source and Box external object(minimum Read access)
Step 7: Test the Integration
- Navigate to the Files tab in Salesforce
- Select Connect to External File System and choose Box
- Authenticate using your Box credentials
- Verify that you can browse and link Box files to Salesforce records

Step 7: Add Files Related List to the Page Layout
If the “Files” section is not visible on the record page:
- Go to Setup → Object Manager
- Select the object (e.g., Opportunity, Lead, or Case)
- Go to Page Layouts (Opportunity) and edit the relevant page layout
- Ensure the “Files” related list is added to the layout
- Save the changes
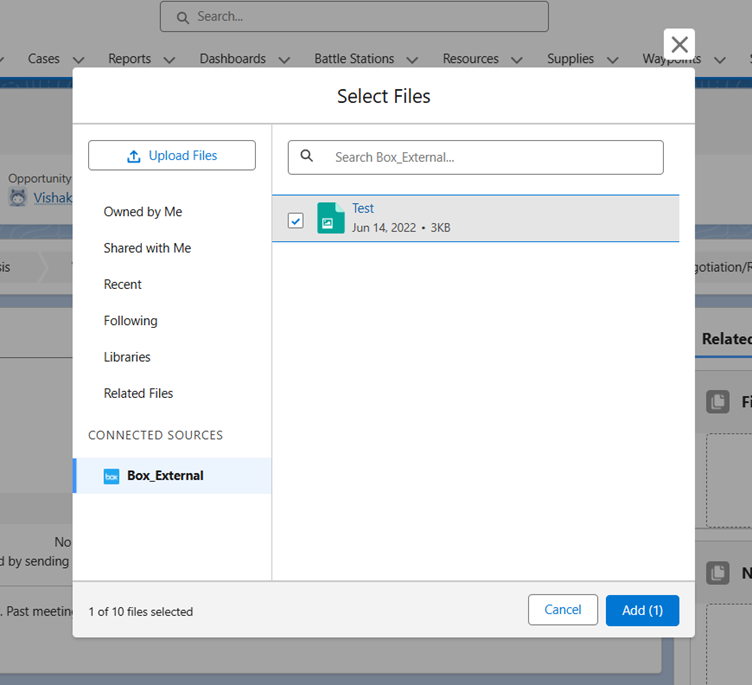
- Open any Opportunity record, under Files Related Tab, click Add File

7. Under the Connected Sources, select the File and click Add button
Integrating Salesforce Files Connect with Box offers a seamless way to manage, access, and share files while keeping them secure in Box. However, if you need advanced features such as file editing, offline access, or robust reporting, consider exploring third-party solutions from the Salesforce AppExchange.


