Single sign-on (SSO) is an authentication method that enables users to access multiple applications with one set of credentials. For example, after users log in to your org, they can automatically access all apps from the App Launcher. You can set up your Salesforce org to trust a third-party identity provider to authenticate users. Or you can configure a third-party app to rely on your org for authentication.
An Identity Provider (IdP) is a system or service responsible for managing and verifying user identities, typically in the context of authentication and authorization processes. It provides a way for users to securely access multiple applications using a single set of login credentials. When a user tries to access a protected resource, the Identity Provider verifies the user’s identity and grants access based on predefined rules and permissions.
A Service Provider (SP) is an entity that provides services or resources to users or other entities over a network or the internet. A service provider typically refers to the entity that hosts the applications, resources, or services that users want to access.
In the below example, we will configure Single Sign-On between two Salesforce Orgs. We will configure one org as a SAML identity provider and set up the other org as service provider. When users log in to the identity provider, they’re automatically authenticated for the service provider. Following are the steps –
- Enable My Domain in both the orgs
- Set up a first Salesforce org as Identity Provider
- Set up second Salesforce org as Service Provider based on the certificate metadata from Identity Provider
- In the Identity Provider, integrate your Service Provider as connected apps
- Create user in both the orgs, make sure they have same federation id
- Test the SSO connection
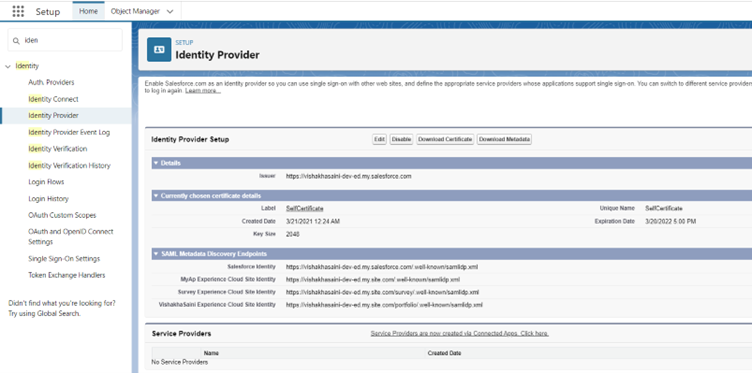
Setup Identity Provider:
- Navigate to Setup and type Identity Provider
- Enable the Identity Provider and download the metadata
3. Create a connected app for service provider. Take Entity Id and ACS URL from service provider
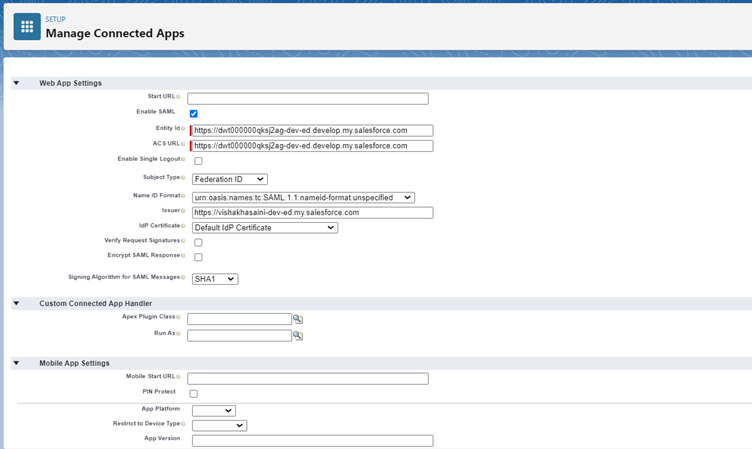
4. Once the connected app is created, click on the Manage button and then Manage Profiles
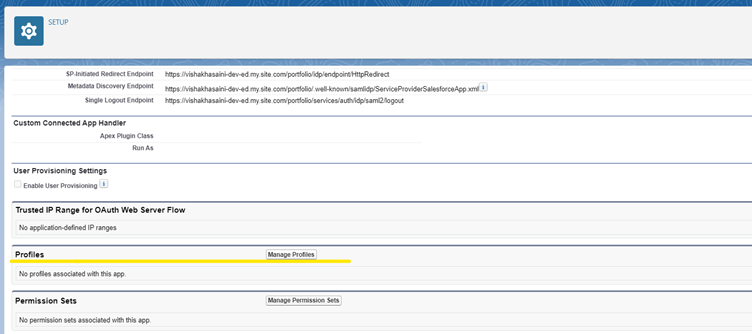
5. Select the profile to give the access to this connected app
Setup Service Provider:
1. Navigate to Setup and type Single Sign-On. Under Single Sign-On Settings, click Edit button and check SAML Enabled.
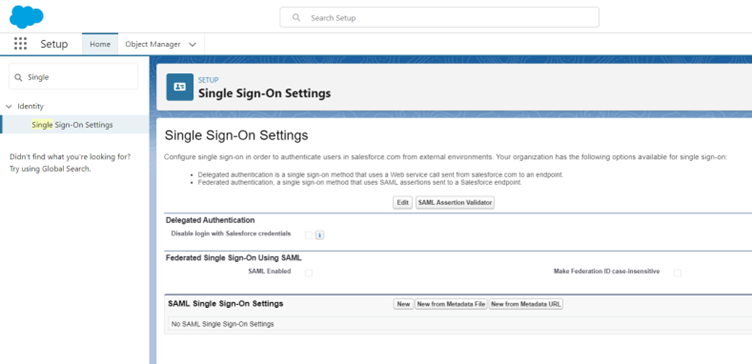
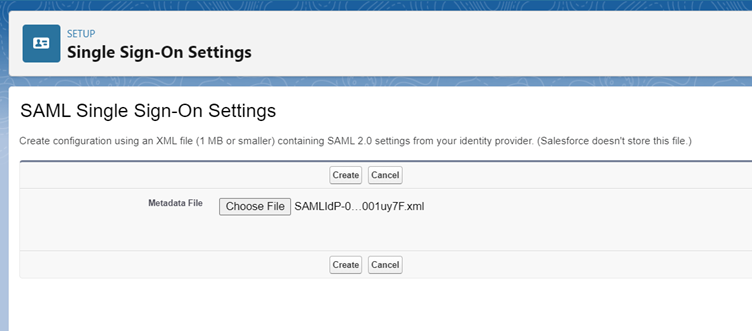
2. Under SAML Single Sign-On Settings section, click New from Metadata File button and select the metadata file received from the Identity Provider. Click Create button
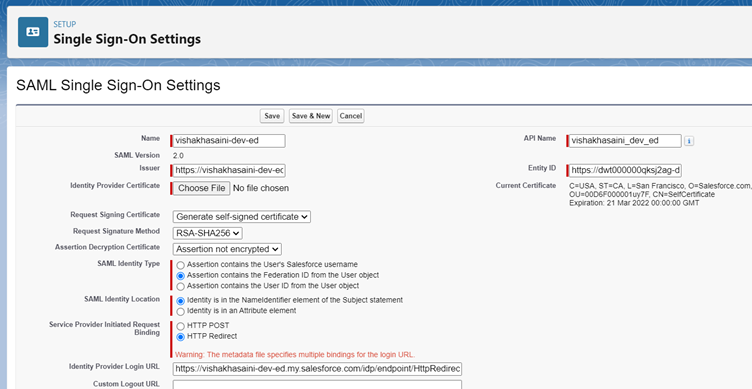
3. Select the SAML Identity Type and Identity Location. Copy the Entity Id and share it with the Identity Provider to include the same in the connected app. Click the Save button
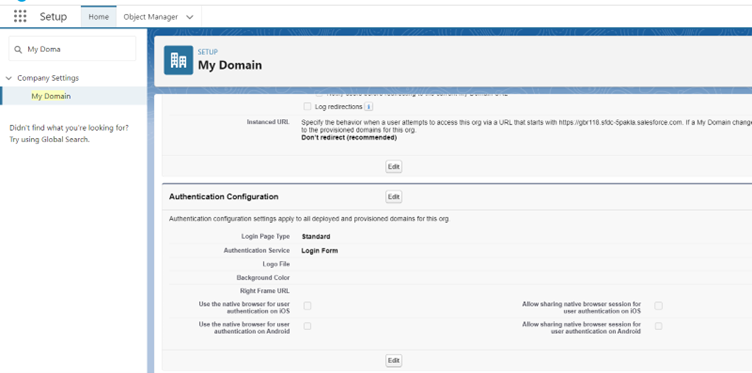
4. Go to My Domain, under Authentication Configuration, click Edit button
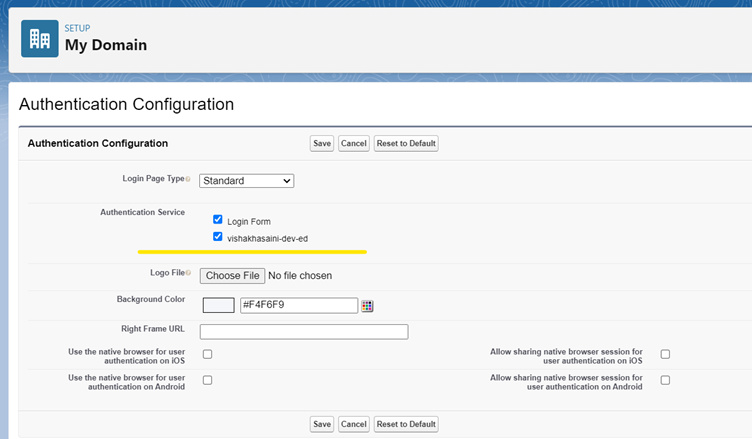
5. Check the Authentication Service which was configured recently and click Save button
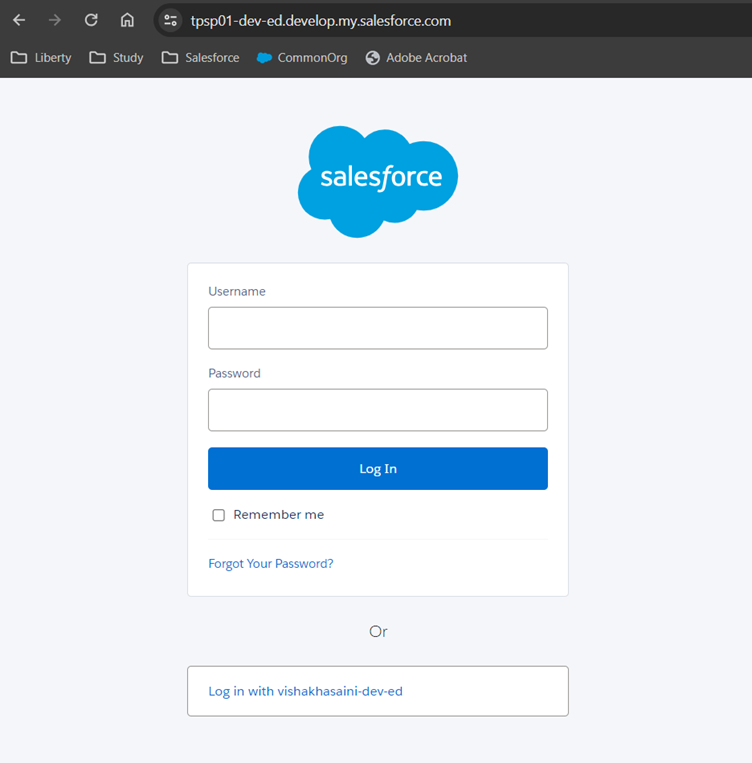
6. Logout from the Service Provider org and Login again. Option to Login with Identity Provider will be available
Create the user record with same Federation Id in the both the Identity Provider and Service Provider orgs and test the SSO login.